As a long-suffering Citrix and RDS administrator, I’ve eagerly awaited the release of Microsoft’s virtual desktop offering that was announced at last year’s Microsoft Ignite – to put it to the test.
With Windows Virtual Desktop finally entering public preview, I took the chance to explore what the service offers and write up a blog post on my deployment experience, the “gotchas” I ran into, and some initial thoughts. Fair warning – this is a long article, so skip to the end if you want my verdict!

Windows Virtual Desktop – What you need before you begin
Before you start, you will need to have the following:
- An active Azure Subscription
- A pre-configured Virtual network & AD Domain
- A bit of patience: It’s still in preview, and different people are reporting varying levels of success with the deployment.
Thankfully, the deployment process has been well documented by Microsoft and I already had a lab environment set up.
For those wishing to follow along in a safe environment, I’ve placed some Azure Resource Manager (ARM) templates here for deploying some of the prerequisite infrastructure (you still need to configure AD properly).
Now – onto the fun stuff!
Windows Virtual Desktop – Step # 1: Installation
The first thing you will want to do, is grab some useful information and the new PowerShell module.
Locate and note down your AAD tenant ID and subscription ID – you will need these shortly. To install the PowerShell module, use the following command:


You should be able to verify the install with:

The grid view is not needed; it just makes everything so much easier to find!

Windows Virtual Desktop – Step # 2: Tenant setup
Now, open the following URL: https://rdweb.wvd.microsoft.com in two separate tabs.
Take note that we need to complete the next process twice: Once for the service, and once for the client.
In the first window, input your Tenant ID and click submit. You will be asked to sign in and should get back a success message.
In the second window, swap the drop-down to “Client App”, input your tenant ID and submit. Hopefully you will get a second success!

Windows Virtual Desktop – Step # 3: Assigning users, roles and permissions
You should now be able to view the Windows Virtual Desktop within your enterprise applications, as demonstrated in the next screenshot below.

From the Enterprise Apps page, you will need to add an application permission to “Windows Virtual Desktop”; Assign a new user, and the role should be automatically populated as tenant creator.

Windows Virtual Desktop – Step # 4: Powershell
Next, you will create a Virtual Desktop Tenant using PowerShell. The following two commands should complete this, with a slight pause for a password!

Make sure you keep the tenant name in mind, as you will need this shortly.

I got a bit side tracked at this point, as it looked as if I could specify extra flags for an OMS workspace.
The possibility of on-boarding the service from the first deployment is something I could not pass up.
Sadly, it didn’t appear to function, so I’ve left this as something to investigate as the product comes out of preview!
Windows Virtual Desktop – Step # 5: Session Host Pool
Next, we will create the juiciest part – a session host pool! Navigate to the resource addition section of Azure and look up “Windows Virtual Desktop – Provision a host pool”.
The setup is a simple ClickOps exercise with a couple of gotchas. I won’t dive too deep here, as the portal is self-explanatory. The basics are as follows:
Configure a host pool: Also configure your initial testing users. Jot down the host pool name, as you will need this later.

For the VM configuration: Select how many users you expect, how much usage you expect, and a VM name prefix. Azure only allows 15 characters for VM names, so don’t make this one too long. If you’re labbing the solution, it’s probably good to change the VM size and make sure it’s a single VM – 100 D8S virtual machines really hammers the credit card!

More VM configuration: This time its domain joining and the VNet configuration. Important to call out here, the web portal does not appear to recognise subdomains. Should you utilise a subdomain, you will need to select the “specify domain” option and type it in. I had corp.contoso.com (original, I know) as my domain, so this got me scratching my head for a bit!

Tenant Configuration: This is where you will utilize the Tenant name from those initial PowerShell commands. If you didn’t keep record of it, get-rdstenant is your friend! Use the credentials for the user you specified as “TenantCreator” earlier.

Final cleanup: Validate everything is correct and click deploy! (10 points to anyone who spots the error in the below validation!)

I’ve downloaded the template here, because if you’re not using templates and automation – you’re living in the past. Something for a future blog post! The deployment can take a while depending on your VM sizing, so patience is key.
Windows Virtual Desktop – Step # 6: Test users

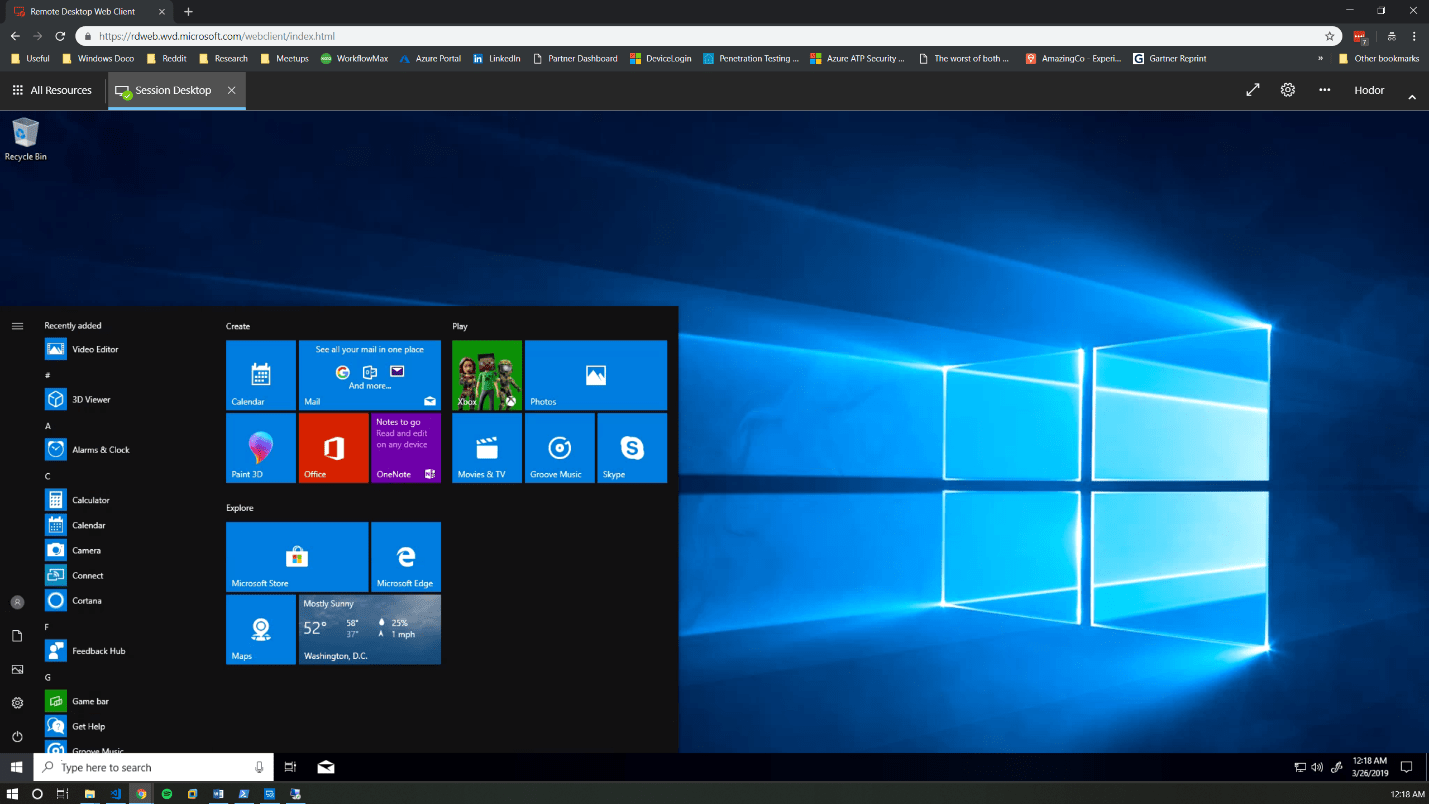
If you have followed along with me for this long, well done! Once the deployment is completed, you should be able to log into this page with a test user.

Note: If you need to add extra test users, the doc for that is simple and can be located here.
Windows Virtual Desktop – The Final Verdict
My initial thoughts on the Windows Virtual Desktop product are super positive.
For starters, it’s a huge upgrade from Remote Desktop Services 2016. My key comments and advice when evaluating or troubleshooting are:
- Pay attention! While most of the deployment is a “next, next” click-through exercise, there is a lot of room for error.
- The product is in preview and will have undocumented issues, so be careful with your deployment size. While Microsoft takes care of the underlying connection brokering and session management, the default 100 VM deployment is expensive.
- Don’t test this with an Azure AD account late at night. The solution uses on-premise AD and you will be confused.
- The product currently only supports Central US & East US 2. This will change as the product comes out of preview but expect some latency in the short term.

- Do you have application configuration or performance requirements? You may need to test them a bit more than normal. Considering Microsoft acquired FSLogix for this reason, I have yet to evaluate how Microsoft worked through performance challenges and non-persistent settings. OneDrive comes to mind in this space.
- Should you run into errors, the Microsoft Doc and the event logs are your friends. I had to be patient and use the diagnostic commands at different stages when getting used to the product. Don’t be afraid to log into each desktop directly either. Under the hood, it is still Windows 10!
If you want to learn more about Windows Virtual Desktop, or even just grab some advice on deployment, please feel free to reach out to myself and the Xello team!
Like the walkthrough? Stay tuned for Part 2 in my technical blog series, where I’ll next be covering Azure Sentinel and putting its many security benefits to the test.
Originally Posted on xello.com.au
