
Recently I spent some time updating my personal technology stack. As an Identity nerd, I thought to myself that SSO everywhere would be a really nice touch. Unfortunately SSO everywhere is not as easy as it sounds – More on that in a future post. For my personal setup, I use Office 365 and have centralised the majority of my applications on Azure AD. I find that the licensing inclusions for my day to day work and lab are just too good to resist. But what about my other love? If you’ve read this blog recently, you will know I’ve heavily invested into the Okta Identity platform. However aside from a root account I really don’t want to store credentials any-more. Especially considering my track record with lab account management. This blog details my experience and tips for setting up inbound federation from AzureAD to Okta, with admin role assignment being pushed to Okta using SAML JIT.
So what is the plan?
For all my integrations, I’m aiming to ensure that access is centralised; I should be able to create a user in AzureAD and then push them out to the application. How this occurs is a problem to handle per application. As Okta is traditionally an identity provider, this setup is a little different – I want Okta to act as the service provider. Queue Inbound Federation. For the uninitiated, Inbound federation is an Okta feature that allows any user to SSO into Okta from an external IdP, provided your admin has done some setup. More commonly, inbound federation is used in hub-spoke models for Okta Orgs. In my scenario, Azure AD is acting as a spoke for the Okta Org. The really nice benefit of this is setup I can configure SSO from either service into my SaaS applications.

Configuring Inbound Federation
The process to configure Inbound federation is thankfully pretty simple, although the documentation could probably detail this a little bit better. At a high level, we’re going to complete 3 SSO tasks, with 2 steps for admin assignment via SAML JIT.
- Configure an application within AzureAD
- Configure a identity provider within Okta & download some handy metadata
- Configure the Correct Azure AD Claims & test SSO
- Update our AzureAD Application manifest & claims
- Assign Admin groups using SAMIL JIT and our AzureAD Claims.
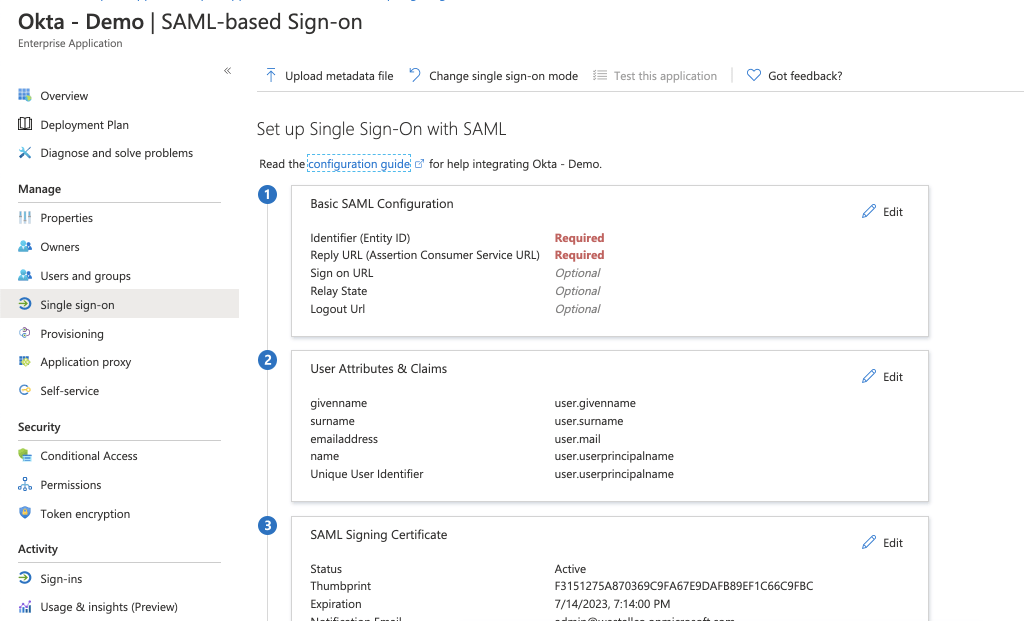
While it does seem like a lot, the process is quite seamless, so let’s get started. First up, add an enterprise application to Azure AD; Name this what you would like your users to see in their apps dashboard. Navigate to SSO and select SAML.
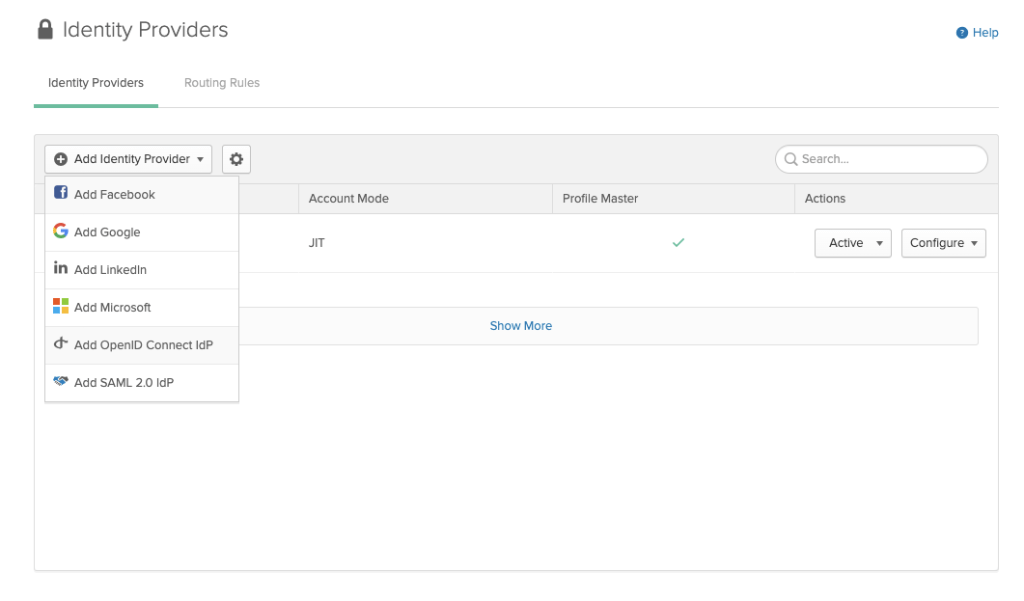
Next, Okta configuration. Select Security>Identity Providers>Add. You might be tempted to select ‘Microsoft’ for OIDC configuration, however we are going to select SAML 2.0 IdP
Using the data from our Azure AD application, we can configure the IDP within Okta. My settings are summarised as follows:
- IdP Username should be: idpuser.subjectNameId
- SAML JIT should be ON
- Update User Attributes should be ON (re-activation is personal preference)
- Group assignments are off (for now)
- Okta IdP Issuer URI is the AzureAD Identifier
- IdP Single Sign-On URL is the AzureAD login URL
- IdP Signature Certificate is the Certificate downloaded from the Azure Portal

Click Save and you can download service provider metadata.

Upload the file you just downloaded to the Azure AD application and you’re almost ready to test. Note that the basic SAML configuration is now completed.

Next we need to configure the correct data to flow from Azure AD to Okta. If you have used Okta before, you will know the four key attributes on anyone’s profile: username, email, firstName & lastName. If you inspect the downloaded metadata, you will notice this has slightly changed, with mobilePhone included & username seemingly missing. This is because the Universal Directory maps username to the value provided in NameID. We configured this in the original IdP setup.

Add a claim for each attribute, feeling free to remove the other claims using fully qualified namespaces. My Final claims list looks like this:

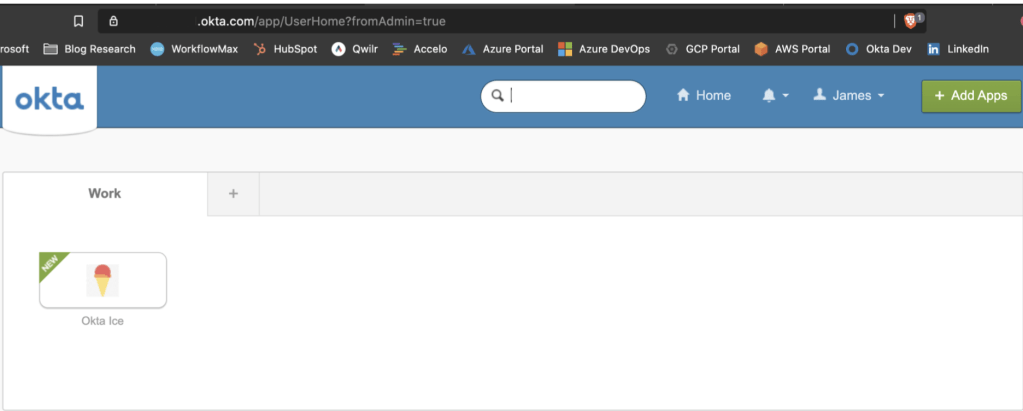
At this point, you should be able to save your work ready for testing. Assign your app to a user and select the icon now available on their myapps dashboard. Alternately you can select the “Test as another user” within the application SSO config. If you have issues when testing, the “MyApps Secure Sign In Extension” really comes in handy here. You can grab this from the Chrome or Firefox web store and use it to cross reference your SAML responses against what you expect to be sent. Luckily, I can complete SSO on the first pass!
Adding Admin Assignment
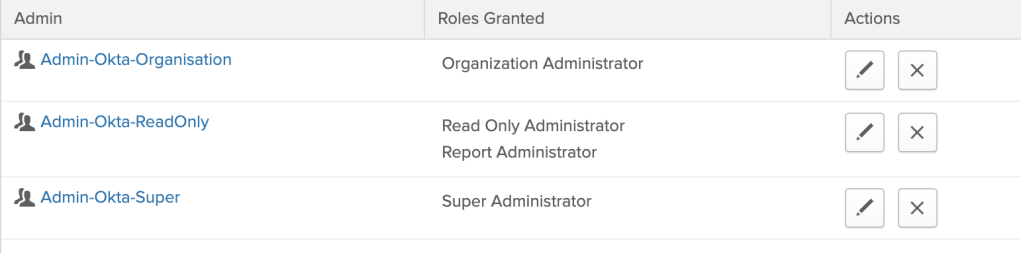
Now that I have SSO working, admin assignment to Okta is something else I would really like to manage in Azure AD. To do this, first I need to configure some admin groups within Okta. I’ve built three basic groups, however you can provide as many as you please.
Next, we need to update the application manifest for our Azure AD app. This can be done at Application Registrations > Appname>Manifest. For each group that you created within Okta, add a new approle like the below, ensuring that the role ID is unique.
{
    "allowedMemberTypes": [
	"User"
    ],
    "description": "Admin-Okta-Super",
    "displayName": "Admin-Okta-Super",
    "id": "18d14569-c3bd-438b-9a66-3a2aee01d14f",
    "isEnabled": true,
    "lang": null,
    "origin": "Application",
    "value": "Admin-Okta-Super"
},
For simplicity, I have matched the value, description and displayName details. The ‘value’ attribute for each approle must correspond with a group created within the Okta Portal, however the others can be a bit more verbose should you desire.
Now that we have modified our application with the appropriate Okta Roles, we need to ensure that AzureAD & Okta to send/accept this data as a claim. First within AzureAD, update your existing claims to include the user Role assignment. This can be done with the “user.assignedRoles” value like so:


Next, update the Okta IDP you configured earlier to complete group sync like so. Note that the group filter prevents any extra memberships from being pushed across.
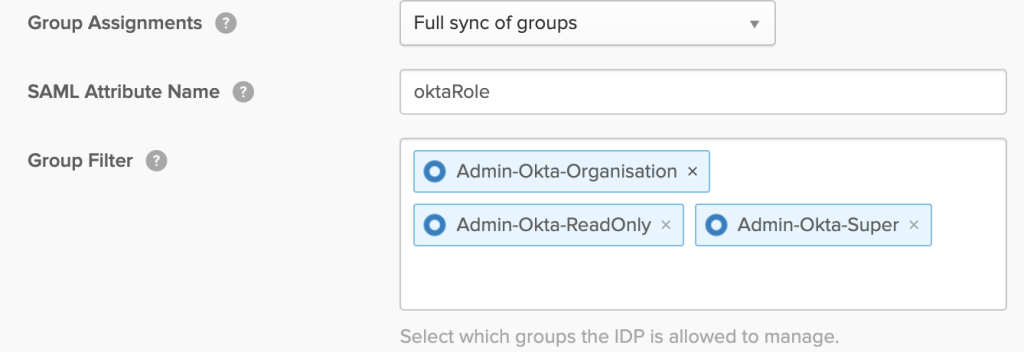
For a large amounts of groups, I would recommend pushing attributes as claims and configuring group rules within Okta for dynamic assignment.
Update your Azure AD user/group assignment within the Okta App, and once again, you’re ready to test. A second sign-in to the Okta org should reveal an admin button in the top right and moving into this you can validate group memberships. In the below example, I’ve neatly been added to my Super admins group.

Wrapping Up
Hopefully this article has been informative on the process for setting up SAML 2.0 Inbound federation using Azure AD to Okta. Depending on your identity strategy, this can be a really powerful way to manage identity for a service like Okta centrally, bring multiple organisations together or even connect with customers or partners. Personally, this type of setup makes my life easier across the board – I’ve even started to minimise the use of my password manager just by getting creative with SSO solutions!
If you’re interested in chatting further on this topic, please leave a comment or reach out!

Great scenario and use cases, thanks for the detailed steps, very useful
LikeLiked by 1 person
Thanks Alex!
LikeLike